Voicemaker understands the importance of maintaining consistent voice settings across different projects. Adjusting the speed, pitch, and volume of a voice every time can be time-consuming. To simplify this process, we have introduced the Voice Profile Saving feature, allowing you to save your customized voice settings and reuse them whenever needed.
Steps to Save a Voice Profile
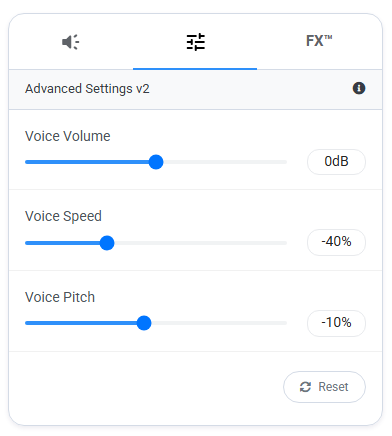
Step 1: Select a voice of your choice and adjust the Speed, Pitch, and Volume using the ‘Voice Settings’ panel on the right sidebar.

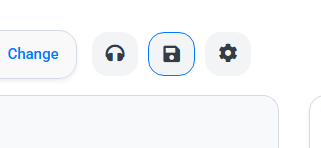
Step 2: Click on the ‘Save’ button located at the top of the editor.
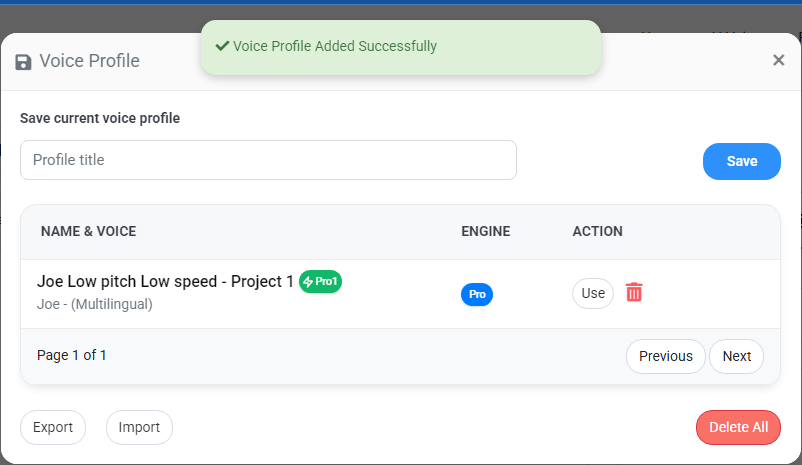
A pop-up window will appear, allowing you to save your voice settings.
Step 3: Enter a name for your voice profile to easily identify it later.

Step 4: Click on the ‘Save’ button.

Your voice profile is now saved. You can repeat this process to save multiple customized voices for future use.
How to Access and Use Saved Voice Profiles
Step 1: Click on the ‘Save’ button (same as when saving a voice).
A pop-up window will appear, displaying all your previously saved Voice Profiles with their assigned names.
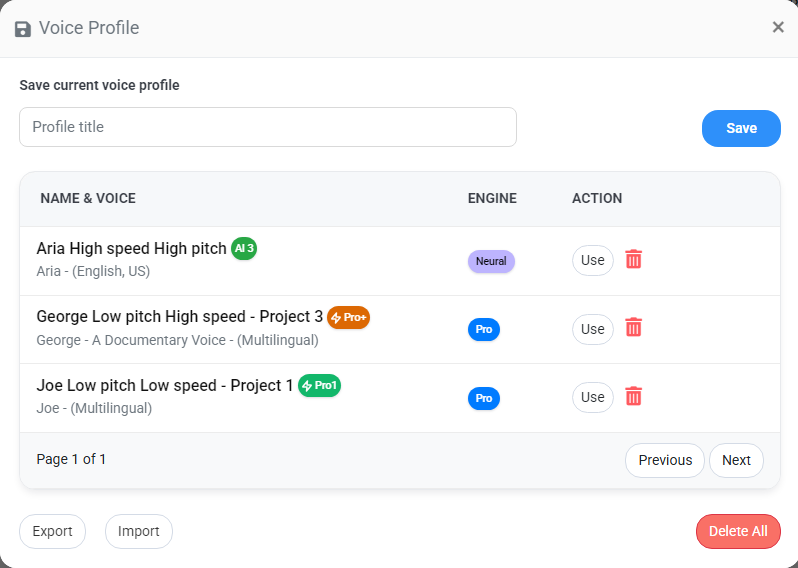
Step 2: Locate the voice profile you want to use and click the ‘Use’ button on the right.


The selected voice and its settings will be applied instantly to the editor.
How to Delete a Saved Voice Profile
Step 1: To delete a saved profile, click on the bin icon next to the voice profile in the pop-up.

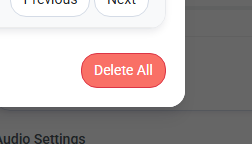
Step 2: To delete all saved Voice Profiles at once, click on the ‘Delete All’ button at the bottom-right corner of the pop-up.
Additional Notes
- You can save multiple voice profiles and switch between them as needed.
- Saved profiles help ensure consistency across projects without requiring manual adjustments.
- You can Export your saved voice profiles in xls format and Import the file from another account to get the saved voice profiles on other account for seamless team collaborations as well.
- This feature is useful for maintaining standard voice settings, whether for personal use or team collaboration.